This article is about how to write a WordPress Post. For this article, I am going to assume the reader knows absolutely nothing other than how to use a web browser. If you know most of this stuff, feel free to scroll to where you may find something interesting. Also I am assuming that you have WordPress installed on your own personal domain, not on WordPress.org, which is the free hosted blogging platform. I am also not going to go into the reasons why we should write posts. This is mainly a tutorial.
Login to your WordPress
You can login to WordPress usually at your admin domain which should look something like www.yourdomain.com/wp-admin. Most admin pages by default are at the “wp-admin” of your domain. The login screen should look something like this.
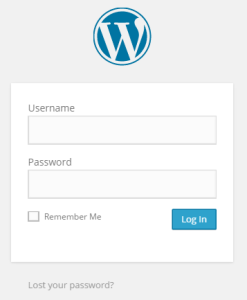
You should have gotten an invite via email from your webmaster or after your WordPress install giving you your login and password. If you forgot your password, there is a “Lost your password?” link where you can ask to have it emailed to you. Make sure you check any new emails you have that are associated with your domain, your webmaster may have set you up a new email and it may be over there instead of on your personal Gmail or Yahoo account. If not, you can always ask. Also, you may have a WordPress account dedicated to you that is separate from your webmasters account or you may be sharing the same account as your webmaster. It really depends on the situation.
Create a New Post
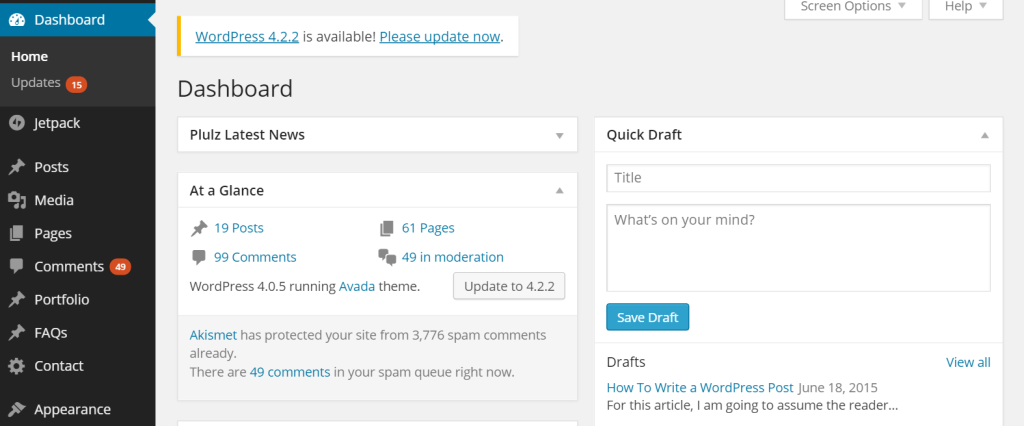
After you login, you will see a screen that looks similar to this. Ignore all the software upgrade appeals, I can go into the best way to upgrade another day. But for now, click on the button on the left hand side menu that says “Posts”. Too easy.
Once you click on posts, you will see something that looks like this.
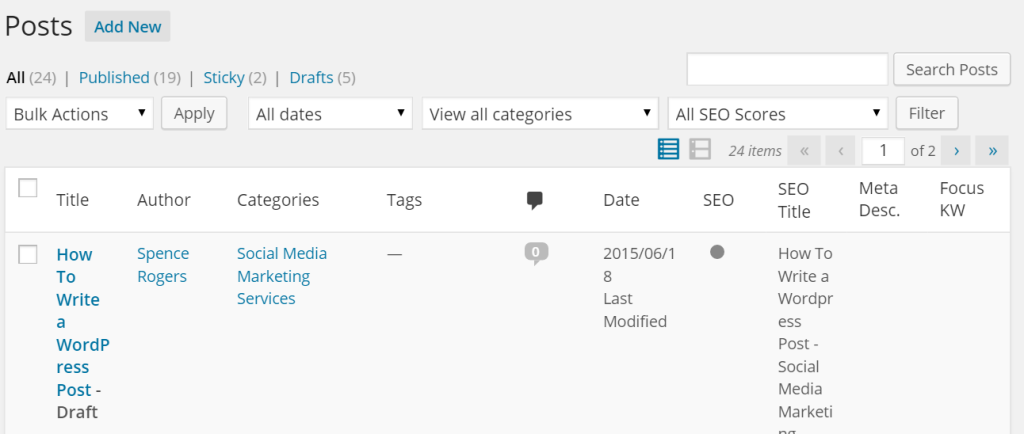
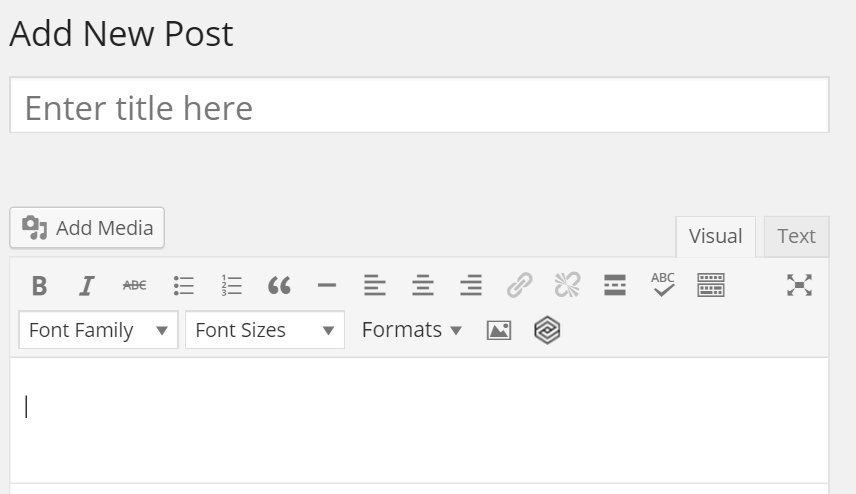
Click on the button in the top left of the screen called “Add New”. It is write next to the “Posts” heading, you can’t miss it. When you add a new post, the screen looks like this:
Pick a Title
In the title section shown in the above image, write down your title. First you need to pick a title that is good for search engines, good for people searching for your article, good for social media, and sums up your article pretty well. So for example, this post is called “How to Write a WordPress Post”. It is pretty self explanatory and Google knows what we are doing, the reader knows what we are doing, social media will be able to tell what we are doing, and it does a good job summing up what the post is about. This page will hopefully do well over time because people can find this article well based on the title.
When writing your title, you want to be consistent with your capital letters. Some people capitalize every single word. Some people capitalize the first word. I like to capitalize every word that is over 3 letters. It all depends, but you have to be consistent and it has to look professional so your article maintains credibility.
One of the many benefits of WordPress is that it auto-optimizes things for you. So when you pick your title, it will automatically name your page address for this page your title. So for this article, our title is “How to Write a WordPress Post”, so wordpress named the page address “growtowinmarketing.com/how-to-write-a-wordpress-post/”. This is very helpful for users to find your content easily and for search engines to index your page. It is a very helpful function.
WordPress also automatically assigns a “T1” tag to your title, which tells search engines that it is the official and main title of your blog. That is a good thing as well. The title is the most important part of the article, because so much happens when you pick it. Below is what it looks like when you pick your title. If you want to see the full address like below, just click on the part of the address and it will expand to show you like below. But you don’t need to do anything, WordPress will name it for you. This is just to show you what it looks like.

Pick Your Featured Image
Your image is the 2nd most important part of the post simply because it is what people will see first, sometimes even before your title. A couple of things about images:
Make Sure Your Image is Allowed
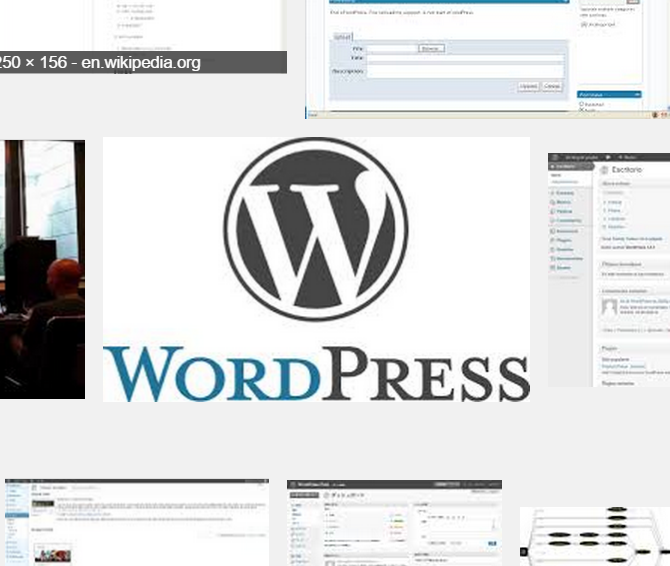
Pick an image that you own, that is public domain, or that you have permission to use. This used to be a big problem years ago, but nowadays with social media, image copyrights are pretty much out the window as everyone “jacks” (a friendlier term for steals) other pages images and reposts them on their page. Ironically, the page they took the image from probably just got done doing the same thing. So images are everywhere, and copyright is out the window. But regardless, there are those guys who are into photography or who are very passionate about their images, so if you take one from somewhere, it is always best to ask. It is also always good to link to the page if you used an image, it can’t hurt to give someone credit. One great place to find images is “Google Images”. If you search in Google Images the following “site:wikipedia.org” followed by your keyword request, you will get a lot of public domain images that can be used. Wikipedia is a great site for free images. So here is an example, search” “site:wikipedia.org Wordpess”. You get a bunch of images. One I thought looked pretty good was this one:
Make Sure Your Image is High Resolution
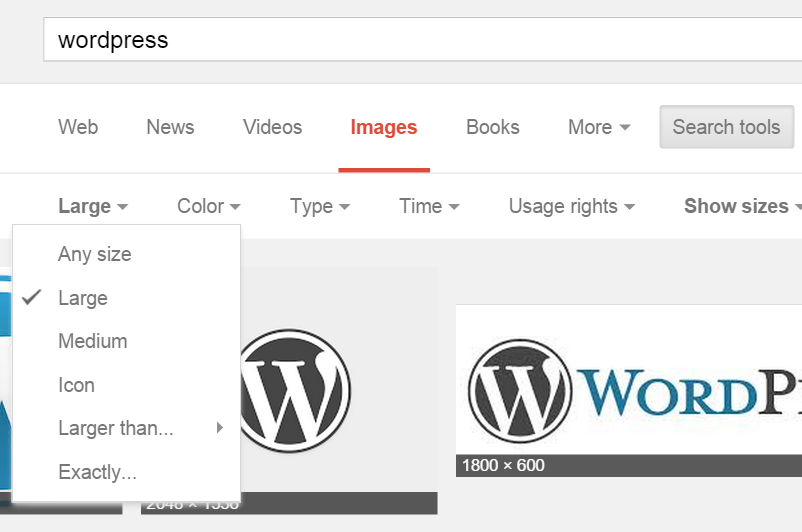
However, I noticed that this image was only 500 pixels wide, so I didn’t use it. I want to try and get one that is a little more high definition, so I think I am going to look for the WordPress official logo since WordPress probably wouldn’t mind me using it. I am writing about how to write an article on their platform and I am using their platform to write it. So I think we are good-to-go. So I went back to Google Images and searched just “WordPress”. Once there, I clicked on the “Search Tools” button in Google which opened up a menu. Then on the far left I clicked “size”, which gave me the option to choose only “large” images. This will make sure I am looking at nice high definition images. I then found a high resolution image that was over 1000 pixels wide. The one I found is the one you see at the top of this article. Notice the drop down menu below where I selected “Large” for image size.
Make Sure it is the Right Dimensions
You don’t want a square image going into a place where the dimensions are supposed to be a rectangle. It won’t look right. So you want to try and make sure the image is wider than it is tall so that it can nicely fit on your blog.
Optimize and Upload the Image
When you download the image you want to use, go to your computer and rename the image to the title of your article. So the image we found in the above explanation is called the title of this post, plus the number 7 just because I like to number my images as I use them. But the words are more important than the number. This is to help you with Search Engine Optimization. It helps Google know more about what your article is about when the image is name properly. Here is what it looks like on my computer before I upload it. I renamed the file name on my computer to “How to Write a WordPress Post 7”.
Now, in order to upload it, click the “Set Featured Image” link on your post creation page. It is on the right hand side somewhere and should look something like this:

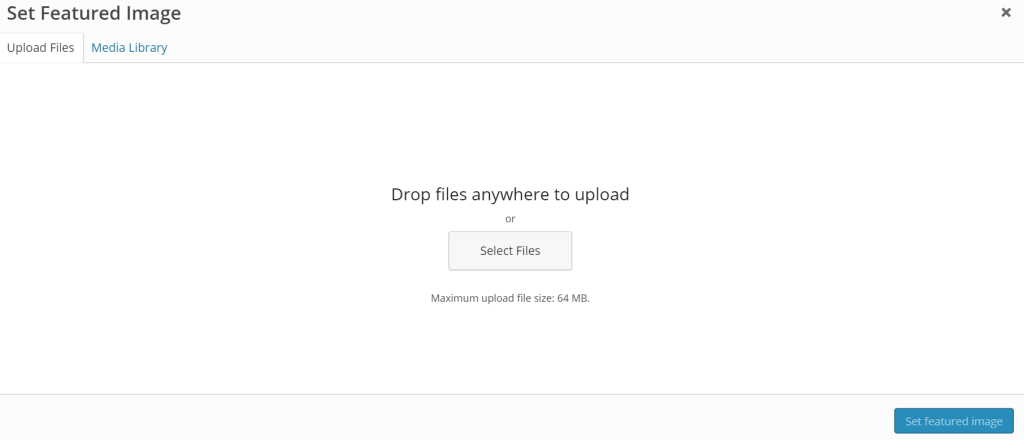
Once you click on that, then a pop up window will show up. When it opens, click the “Upload Files” tab. Then click the “select files” button to upload the new image you downloaded previously. Your image should be named the name of the article as mentioned before. Below is what the upload screen looks like.
Once you upload it, you will get a screen where you can see the image attributes. I always copy and paste the image title into the Title, Caption, Alternate Text, and Description. That way you get even more search engine optimization (SEO) on your image. This isn’t essential, but it is just a good SEO habit and it has helped in the past. It doesn’t take much time to do. Here is an image of it:
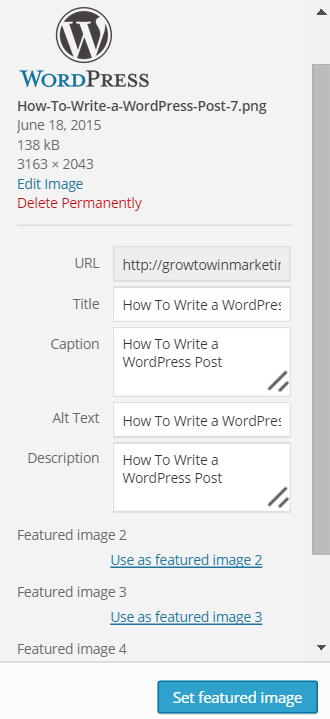
Once ready, click the button that says “Set featured image” and your image is now ready to go.
Write Content
This is the main part of the article… This is the one where you let your writing juices flow.
Write for the Reader, not for Google
Once thing to consider is this section is that you want to have a flow and a point to your article. If you can provide some kind of technical information, some kind of know-how, or some kind of analysis about whatever you are talking about, it will help. You want people to find value in what you are writing. If it reads poorly or is hard to understand or just plain isn’t interesting, it won’t do well for you overall. It will hurt your brand and it won’t help you in the search engines. You also won’t get valuable feedback from people on social media when you post it, because the article didn’t do much for them. So that is the first point.
Use Heading Tags (H2, H3)
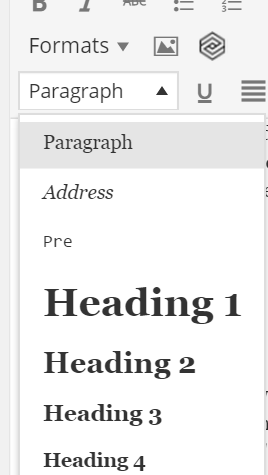
If you notice, this article has a bunch of headings and subheadings. The main title is called an H1 heading. You only want one of those, and WordPress handles that for you. But you want to at least break up your content with some other headings to help the reader find their way around. It makes it easier on the eyes. It also help Google know what your site is about. Google used to put a lot of weight on the subtitle tags – they have backed off a little but it still helps with relevancy in Google search. So use them. Where do you go to set those tags? In the title bar above the post there is a drop down toolbar button that looks like this:

Click that button, and you will see a bunch more buttons and a drop down menu come up. Click on the drop down menu. It should say “Paragraph” with a white background. That is your default font setting for your text. But to change something to a Title Tag, you can selection “Heading 2” and “Heading 3”. Again, I wouldn’t use “Heading 1” because you will confuse people and Google, that should be reserved for your blog title, which is automatic. Here is what the drop down menu looks like.
Use In-Text Images
As you can see in this article, there are a lot of images. Readers like pictures. So does Google. So if you have the time and it will improve the quality of your article, add more pictures. The best way to add them in the body of the text is to put your cursor in a spot where you want the image, then go up to your toolbar above (same place where the Headings are) and click on “Add Media”. From there it is the same as when you did the Featured Image above. So just upload and select your image. You can also resize it or add search engine text to it to help with relevancy. I always do, but again it is based on your patience level and time requirements.
Here is what the “Add Media” button looks like.
Add Outgoing Links
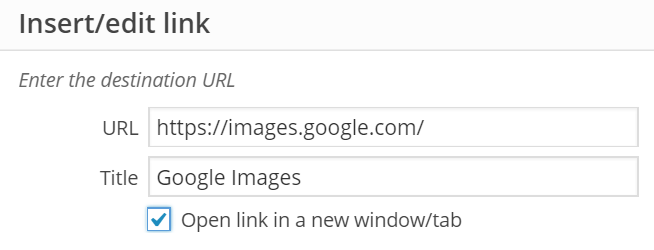
If you are talking about something that relates to a company or another website, it may be a good idea to link to them. This is good business and good for SEO. The only time I would not link to a website is if it is questionable or has a bad reputation. If you can link to some high visibility sites, especially if they relate to your post, go for it. To add a hyperlink, mark the text you want to hyperlink, then go to the toolbar and click this button.

Then this pop up window will come up. Fill in the link and make sure if you have time to put the title of the link. This is helpful to the reader and helpful to your SEO with Google. I usually have external links open up in new window so I check the box in the picture. But sometimes it is not needed. Also, if you link to pages on your own site, you don’t need to check it.
Justify and Align Images and Texts in Post
If there is something that is meant to be centered, center it. Here is what the center button looks like.

If there is text that should be justified on the right and left side of the article, you want to hit the justify button.

How you justify your page is your call, but it is a good idea to do it if you think it will make the post look better.
Pick One Category
One other great thing about WordPress is that it lets you pick categories. You can pick as many categories as you want, but the purpose of categories is to organize your page from the top down, and not be lateral. That is why I say to pick only one category. Also, Google will only give you credit for one, so you want to pick the best one so Google doesn’t get confused. You want the site structure to be solid for Google. So this is what I mean by top down categories.
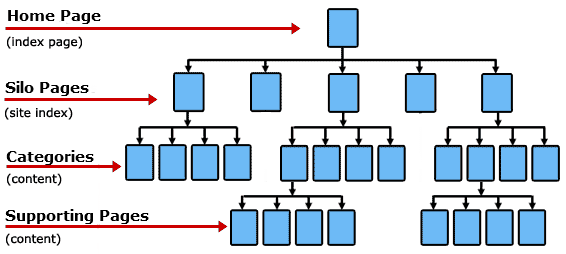
Image from: Themezoom-neuroeconomics.com
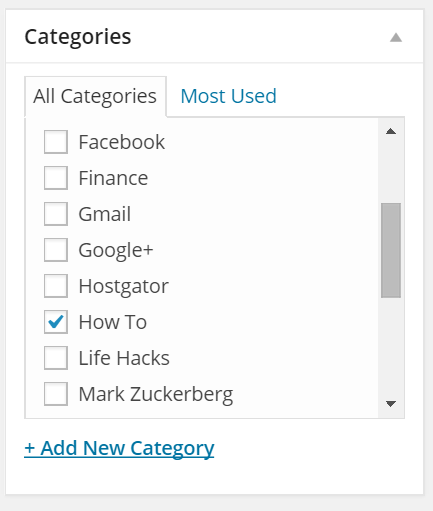
So when you pick one category, you help your site structure. To pick your categories, go to the right hand side of your post page and find the section called “Categories”. See below for what it looks like. Since your page is probably new, you have to pick a category from scratch. To do that, just click “Add New Category”. So it is up to you what your main categories will be. If you have less than 10 posts, my suggestion is to try to start out with 2-3 categories. Don’t overdo it or your site will spread too thin and won’t do well for the reader or Google. For this article, I picked “How To” as the category. I may change it later, but for now that will do.
Pick 3-5 Relevant Tags
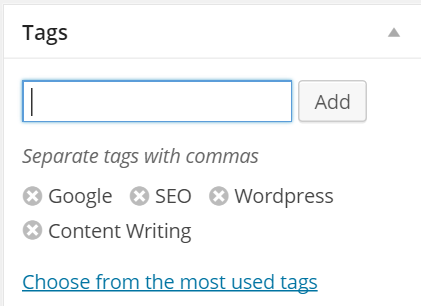
Tags are like hashtags on Twitter or like the index page in a book. But you don’t want to overdo it. You want to pick 3-5 high-level topics that your article covers. So for this article, we are going to pick “WordPress”, “Google”, “Content Writing”, and “SEO”. Those are relevant and will do nicely. To pick your tags, go to the right hand side, generally under or just above your categories section. Here is what it looks like.
If your company is a niche industry, doing categories and tags right is going to be like SEO gold for your business. Especially if other companies in your industry aren’t very knowledgeable about blog writing and SEO.
Preview and Reread Your Post
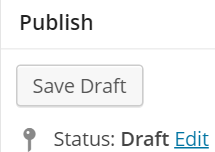
Nothing is worse than writing a post and noticing formatting or spelling errors later on. You want to prevent this as much as possible. You want to see what your post looks like. So preview it. To do that, click the preview button at the top of the page above the toolbar. Make sure you save your work first just in case. Here is the save button, which is on the top right of your page:
Here is what the preview button looks like:

Publish Your Post
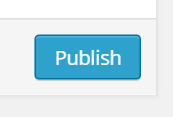
Make changes and tweak your post. Then, once done, click publish. But you are not done yet. The publish button is on the top right of your post editor page. It looks like this:
Promote Your Post for Free
Once your post is published, go to Bitly.com and shorten your url so that it can be used on social media effectively. Go to your Facebook, Twitter, Linked, Google+, and any other sites you are on to post your new article using your new shortened url from Bitly. Make sure to write a good explanation or catchy reason why you are posting it that is different than the title, because the title will automatically be there anyways in the social media preview.
Respond to Feedback
Once your post is written and promoted, you may get comments about it on social media or under the post itself in the comments section. It is important to respond quickly in order to encourage feedback. Or you may get a negative comment from a disgruntled customer or employee, you will want to monitor that and handle those accordingly right away. If you write about controversial topics like religion, politics, or social issues, you will definitely fire up the feedback which you won’t want to miss. Your post is now live, and it has been disseminated to your audiences. Checking for comments and activity for about 24 hours maybe 3 or 4 times is about right.
You Are Ready
This may seem like a lot of steps, and some of them may seem unnecessary. I know bloggers who don’t even put images on their blog. It is all what you want to do. I explained what right looks like and I happen to follow my own standard of a blog post. So if you train yourself to use this formula, I can guarantee you won’t be disappointed over time. Your articles will do well in search in the long run and your readers will thank you for the good formatting. If you are doing things right, you are sure to get some business out of it. It is a win win for all.
